Billing History
Please see our support article: Billing: download previous months' activity, invoices, and receipts.
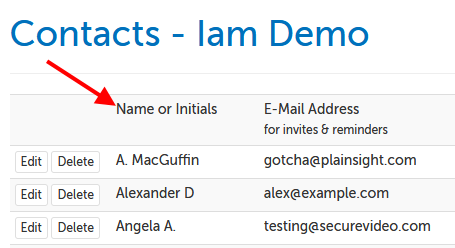
Contacts
While there is not an export function for Contacts, you can copy/paste the page into an Excel spreadsheet.
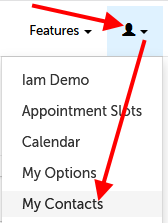
1. Click on the profile icon in the upper right hand corner and select "My Contacts".
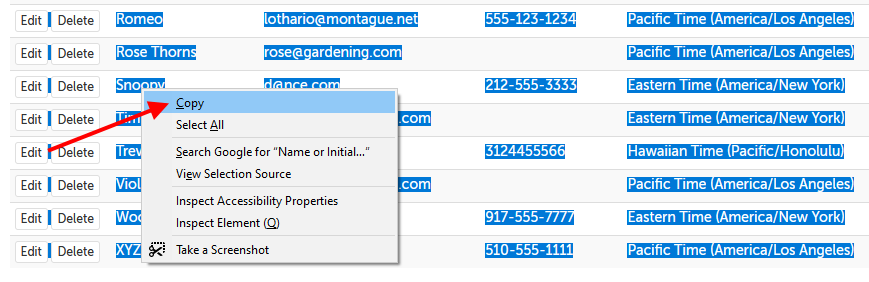
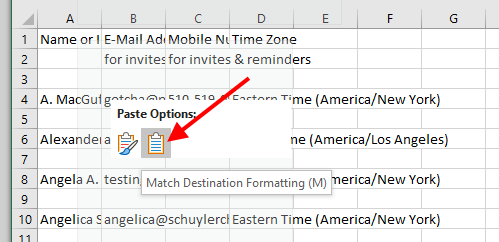
2. Click your mouse cursor to the left of the "Name or Initials" line, and drag your cursor so that it selects all of the names, email addresses, and cell numbers on the page.
Once all of the text is selected, right click anywhere on the selected text and choose "Copy".
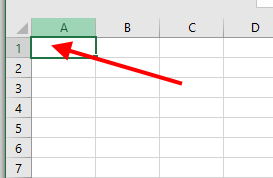
3. Open an Excel spreadsheet (or Google Spreadsheet). Right click into the cell in the upper left hand corner, and select "Paste". (If possible, paste as plain text, or select the option "Match Destination Formatting.)
4. Save the Excel file.
E-documents
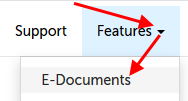
1. Click on the "Features" tab and select "E-documents".
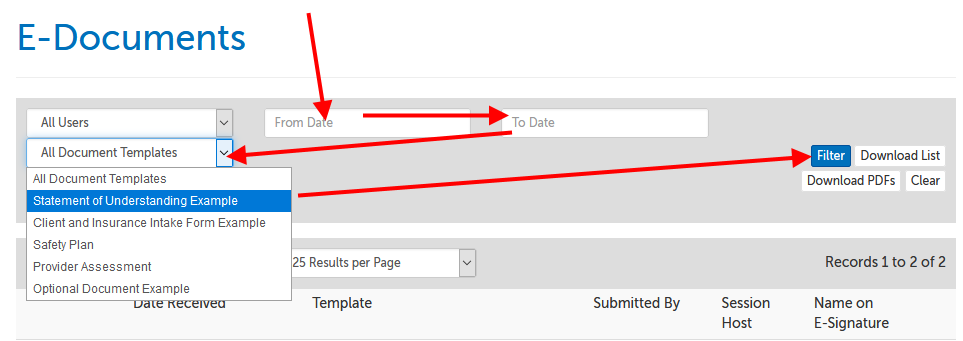
2. Delete the date in "From" and the date in "To", so that you will find all e-documents in your entire history. Then click "Filter" to run the search.
- Before clicking "Filter", if you have more than one e-document type, you can select a specific e-document title by clicking on the "All Document Templates" selection and choosing a specific title from the list. When you click "Filter", it will only show submissions for that e-document. When submissions all match the same e-document ID, then the Excel file list will include all fillable field data as well as the metadata.
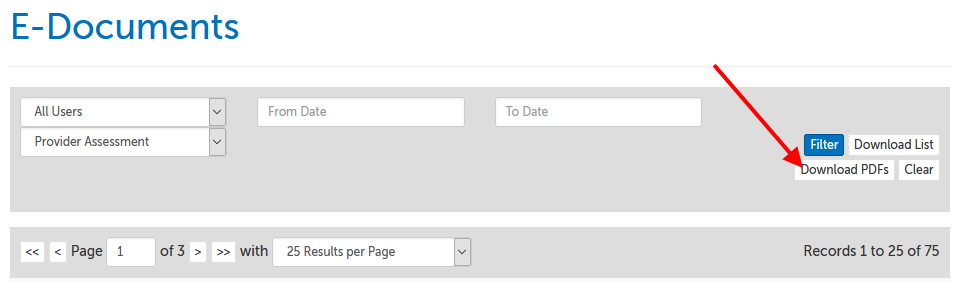
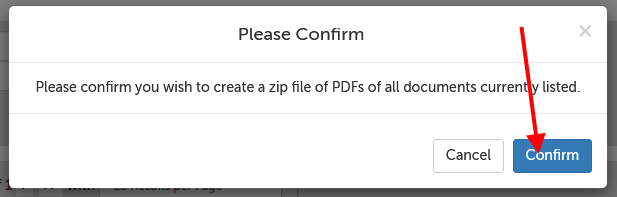
3. Click "Download PDFs".
4. On the confirmation message, click "Confirm".
5. A pending message will appear at the top of the page. (You can leave this page, and it will continue in the background.)

6. After a few minutes, please refresh this page by clicking on the reload icon (or return to this page after navigating elsewhere). The message at the top will now show a download button:

Session History
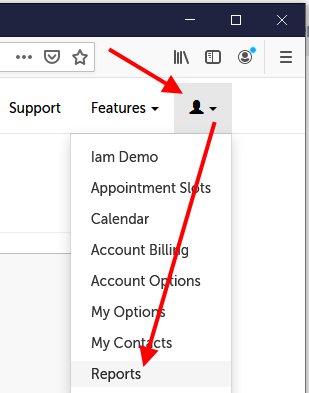
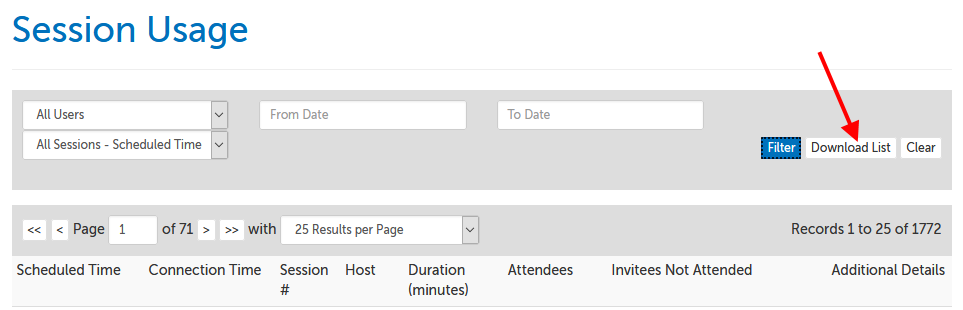
1. Click on the profile icon and then the "Reports" item in the dropdown.
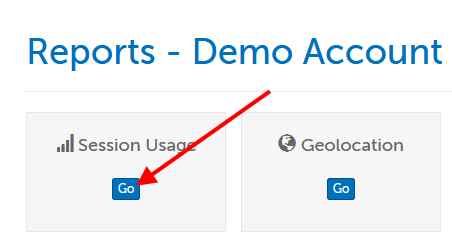
2. Click the "Go" button under "Session Usage".
3. Delete the date in "From" and the date in "To", so that you will find all sessions in your entire history. Then click "Filter" to run the search.
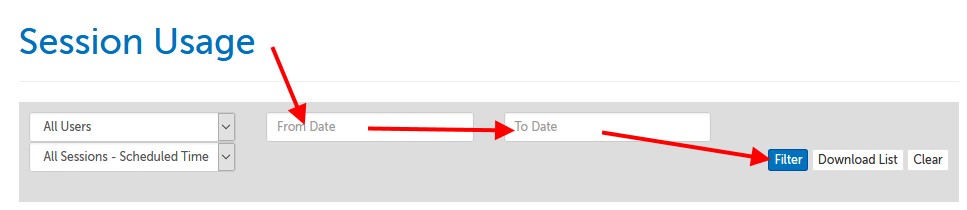
4. Once populated, click the "Download List". Session history will download as an Excel spreadsheet.
Session Notes
Your own session notes
While there is not an export function for Contacts, you can use your browser's Print to PDF function.
1. Click on the "Features" tab and then "Session Notes" in the dropdown.
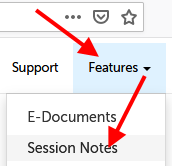
2. Click the "Manage" button next to the name of the participant whose notes you want to export.
3. Access your browser's print function. Within Chrome (image below) you can click on the 3 dots in the upper right hand corner and selecting "Print" from the menu that appears.
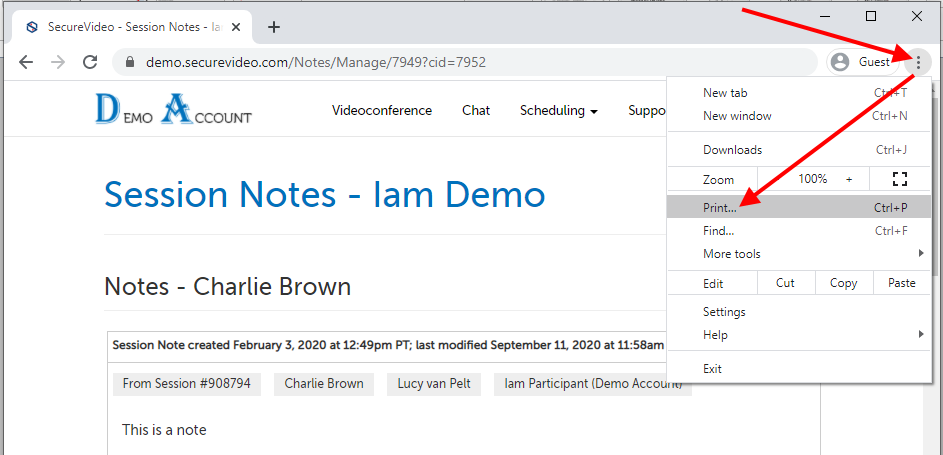
4. Set the "Destination" as "Save as PDF" and then click "Save" to save.
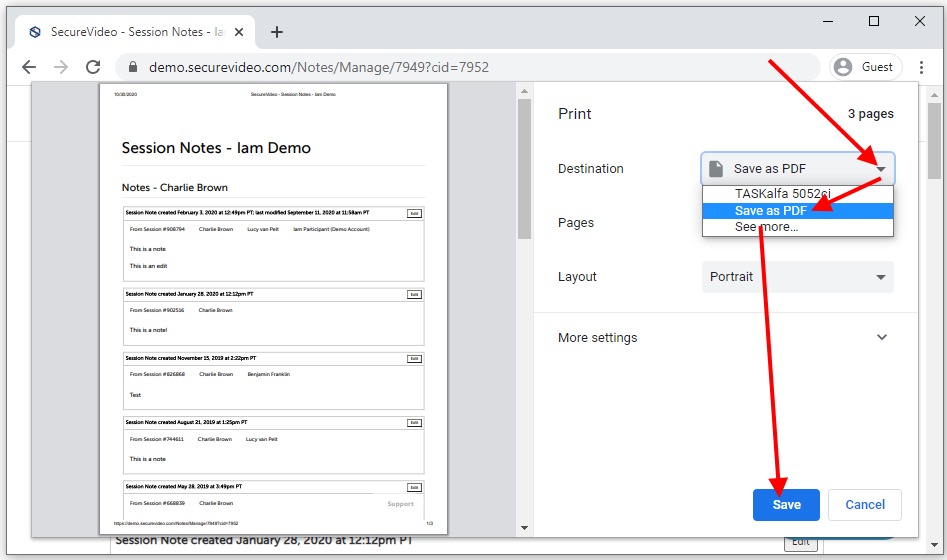
5. You will be prompted to select where on your computer you would like to save, and then confirm to save.
Other users' session notes
While there is not an export function for Contacts, you can use your browser's Print to PDF function. You will need to have the Clinical Supervisor role enabled to access other users' session notes.
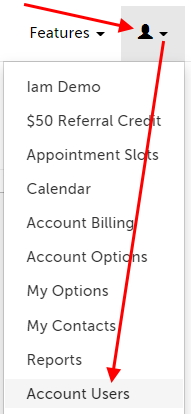
1. Click on the profile icon in the upper right hand corner and select "Account Users".
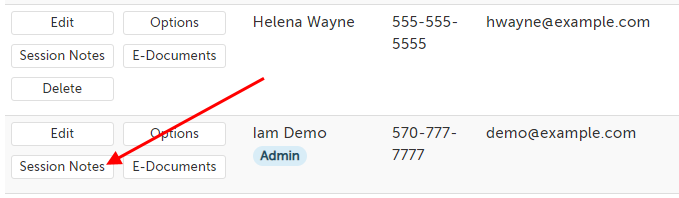
2. Scroll down the page and click the "Session Notes" button next to the user whose notes you want to copy.
3. Click the "Manage" button next to the name of the participant whose notes you want to export.
4. Access your browser's print function. Within Chrome (image below) you can click on the 3 dots in the upper right hand corner and selecting "Print" from the menu that appears.
5. Set the "Destination" as "Save as PDF" and then click "Save" to save.
6. You will be prompted to select where on your computer you would like to save, and then confirm to save.
Recordings
Please see our support article: Recordings: download session recordings.
Users
This section requires an Account Administrator role.
1. Click on the profile icon in the upper right hand corner and select "Account Users".
2. Click "Clear" to make sure that the filters are all set to default, and then click "Download List". The list of all Organization Users will download as an Excel file.

3. If you used the Appointment Slots feature for a public calendar, you may also have Public Users (if you have a different Public User Label, the name displayed in your account may be different). Change the filter from "Organization Users" to the public user label (in the example below, this is "Patients"), and then click "Download List". The list of all Public Users will download as an Excel file.

This article was last reviewed by our Support team on June 26, 2024.